

Some DRY theory FOR BIND DNS:
BIND can be used to run a caching DNS server or an authoritative name server, and provides features like load balancing, notify, dynamic update, split DNS, DNSSEC, IPv6, and more. Berkeley Internet Name Domain (BIND) is the most popular Domain Name System (DNS) server in use today.
MY NOTES:
Following post contains quick reference notes on howto deploy BIND DNS server as MASTER/SLAVE for LAN/WAN. This post also contains some tweaks / tips to make life little easier for my self. At some of my clients, I deployed BIND (at some placed UNBOUND) & created few custom commands menu so that client uses the webmin gui module of webmin to modify records , service reload , service restart, dns test etc. Webmin panel example for operator. Webmin do contain full module to manage BIND, but to get the minimum to the point panel, I used some commands & bash script & tagged it with webmin menu.

Scenario:
We have a public domain name example.com & we want to host our own authoritative public dns server so that dependency on host provider reduced & we can manage all types of records at our site. All Internal clients can use our DNS to resolve dns related queries & other hosts on internet can resolve our domain related hosts via our DNS server. In this scenario our clients will use our dns as primary for resolving, and other internet zones resolving will be forwarded to other public DNS.
Assumptions before proceeding …
- This post contains info for BIND with ipv4 Only
- Domain Name: example.com
- We will have two servers which will be designated as our DNS name servers. This guide will refer to these as ns1 and ns2
- We will have two additional client pc’s records that will be using the DNS infrastructure you create, referred to as
- We will configure MASTER/SLAVE configuration so that in case primary goes down, secondary will still be available to fulfill resolving.
Primary DNS: ns1.example.com – 10.0.0.1
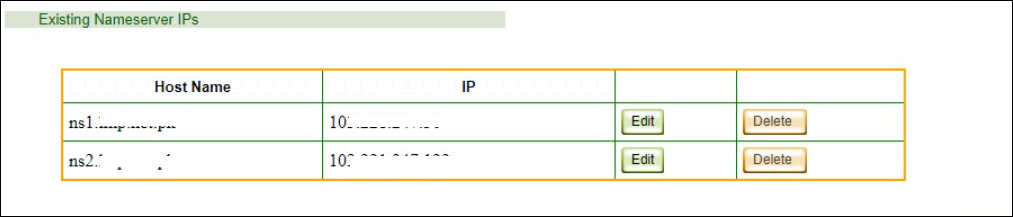
Secondary DNS : ns1.example.com – 10.0.0.2 - Using your hosting provider CPANEL, goto DNS management section & change the default nameservers pointing to your local DNS (local DNs must have static public ip address & must be accessible/allowed via any firewall u might have), example below

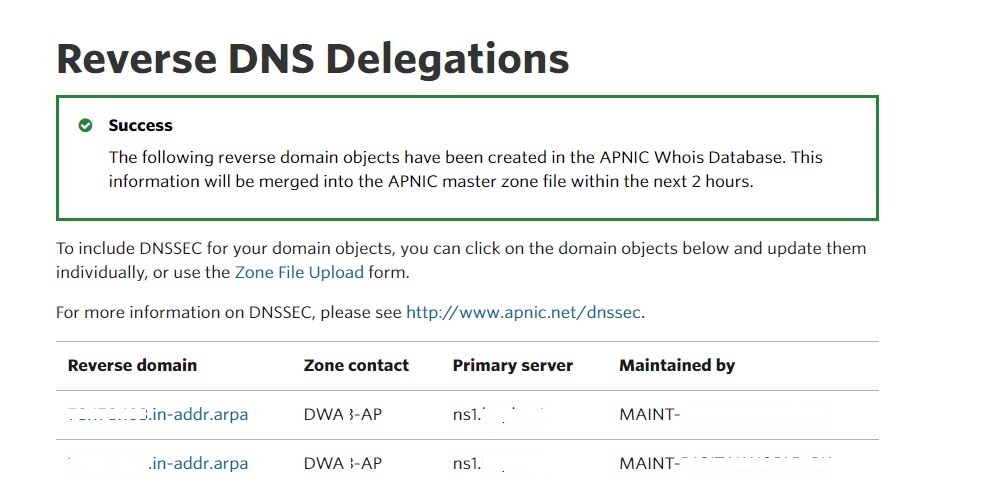
- For Reverse PTR records, use APNIC panel, & configure Reverse DNS Delegation, example below

- Every time you modify zone records, make sure to reload the bind9 service or use the bash script which can change the records as per date/seconds & reload bind service which will trigger SLAVE server to replicate from Master.
When configured as a recursive server, BIND will first use the zones for which it is authoritative before walking down the entire DNS tree from the root/forwarder. for other ZONES , we have configured forwarders, (and root servers can be used in absence of forwarder). We can even create multiple zones, the only limitation is that you will need to maintain all the records in zones you create and ensure they are up to date.
Once we configure & test our DNS, next step is to change NS records on your hosting provider cpanel so that internet can resolve your domain name using your hosted DNS server.
Housekeeping Stuff !
Before installing Bind, we need to perform some housekeeping Stuff first,
NTP:
Make sure you have correct date time syncing with any NTP server with appropriate Time zone as well.
apt-get -y install ntp ntpdate
# Following is for KARCAHI/PK zone, u may select yours accordingly
cp /usr/share/zoneinfo/Asia/Karachi /etc/localtime
BIND installation on Ubuntu 16.4:
apt-get update
apt-get install -y bind9 bind9utils bind9-doc dnsutils
Force IPV4 Only
- OS Level:
Copy Paste below to disable ipv6
echo "net.ipv6.conf.all.disable_ipv6 = 1" >> /etc/sysctl.conf
echo "net.ipv6.conf.default.disable_ipv6 = 1" >> /etc/sysctl.conf
echo "net.ipv6.conf.lo.disable_ipv6 = 1" >> /etc/sysctl.conf
sysctl -p
- BIND Level ipv4 config:
nano /etc/default/bind9
Example:
# run resolvconf?
RESOLVCONF=no
# startup options for the server
OPTIONS="-4 -u bind"
- RESOLV.CONF:
Once BIND is installed, you may want to modify the resolv.conf to look something like below
(For permanent changes, edit appropriate settings in /etc/network/interfaces file)
search example.com # example.com is your domain name
nameserver 10.0.0.1 # your local host ip
** Configuration files for BIND9 – MASTER **
Default installation location folder is /etc/bind9. We will create subfolder named ZONES to hold all zones files separately. Also we will add forwarder/reverse records files location so that BIND should know where our ZONES files are located.
BIND9 DNS Zones Location & Master/Slave Config File
- named.conf.local [It will contain ZONE Files & its parameters]
Edit below file to enter zone name, type, file location etc
nano /etc/bind/named.conf.local
//The following code defines the forwarder lookup zone.
zone "example.com" {
type master;
allow-update { none; }; //Since this is the primary DNS, it should be none.
allow-transfer { 10.0.0.2; }; //Allow Transfer of zone from the master server
also-notify { 10.0.0.2; }; //Notify slave for zone changes

file "/etc/bind/zones/forwarder.example.com";
};

//The following code defines the reverse lookup zone.
zone "0.0.10.in-addr.arpa" {
type master;
allow-update { none; }; //Since this is the primary DNS, it should be none.
allow-transfer { 10.0.0.2; }; //Allow Zone Transfer from master server to ns2 slave server
also-notify { 10.0.0.2; }; //Notify slave for zone changes

file "/etc/bind/zones/reverse.example.com";
};
- named.conf.options [It will contain ACL , Forwarders & related parameters]
nano /etc/bind/named.conf.options
# First we will Define IP pool ACL so that only these ips will be allowed to resolve internal/exteral dns resolving
acl "trusted" {
127.0.0.0/8;
10.0.0.0/8;
# or any other pool/x;
};
options {
directory "/var/cache/bind";
recursion yes; # enables recursive queries
allow-recursion { trusted; }; # allows recursive queries from "trusted" clients ONLY, external clients will be able to resolve records related to example.com only, internal clients mentioned in ACL can query all records lan/wan
recursive-clients 10000; # Fine tuning option for server with High number of users
tcp-clients 1000; # Fine tuning option for server with High number of users
version "syed.jahanzaib";
listen-on { 10.0.0.1; }; # ns1 private IP address - listen on private network only, ns1 local ip
listen-on { 127.0.0.1; }; # ns1 private IP address - listen on private network only
allow-transfer { 10.0.0.2; }; # Allow Transfer of zone to secondary dns ns2.example.com
# Forward all other zones queries to following public dns (Only Trusted ACL will be able to resolve external queries
# This can help to make the responses to these queries faster by reducing the load on the local network.
forwarders {
1.1.1.1;
8.8.8.8;
};
dnssec-validation auto;
auth-nxdomain no; # conform to RFC1035
listen-on-v6 { any; };
};
- ZONE FILES Location and FORWARDER Configuration File:
It will contain zone details , all dns related records
First Create a folder named ZONES which will contain our zones files (forwarders/reverse)
mkdir /etc/bind/zones
### Now create a new file for forwarders records ###
nano /etc/bind/zones/forwarder.example.com
FORWARDER Configuration File:
; BIND FORWARDER A RECORDS
; example.com- LOCLA HOSTED DNS FOR LAN/WAN (RESOLVER/RECURSIVE/CACHING/AUTHORITATIVE)
; 24-SEPTEMBER-202
; BIND DNS Configuration - by Syed Jahanzaib
; aacableAThotmailDOTcom / https://aacableDOTwordpressDOTcom
$ORIGIN example.com.
$TTL 86400
@ IN SOA ns1.example.com. zaib.example.com. (
2022101905 ; Serial
10800 ; REFRESH
3600 ; RETRY
1209600 ; EXPIRE
10800 ; MINIMUM
)
; NS RECORDS
@ IN NS ns1.example.com.
@ IN NS ns2.example.com.
; A RECORDS
@ IN A 10.0.0.1
ns1 IN A 10.0.0.1
ns2 IN A 10.0.0.2
mail IN A 10.0.0.50
; CNAME RECORDS
www IN CNAME example.com.
; MX RECORDS
@ IN MX 10 mail.example.com.
Save & Exit.
REVERSE Configuration File:
It will contain reverse PTR records & also $GENERATE statement for auto generation of unused ips ptr records for
nano /etc/bind/zones/reverse.example.com
Example File:
; BIND REVERSE PTR RECORDS
; example.com - LOCAl HOSTED DNS FOR LAN/WAN (RESOLVER/RECURSIVE/CACHING/AUTHORITATIVE)
; 24-SEPTEMBER-202
; BIND DNS Configuration - by Syed Jahanzaib
; aacableDOThotmail.com / https://aacableDOTwordpressDOTcom</pre>
$TTL 43200
@ IN SOA example.com. ns1 (
2022101905 ; Serial
14400 ;
1800 ;
1209600 ;
3600 ;
)

@ IN NS ns1.example.com.
1 IN PTR ns1.example.com.
2 IN PTR ns2.example.com.
50 IN PTR mail.example.com.
;generate auto ptr for few hosts as defined below
$GENERATE 150-255 $ IN PTR 10.0.0-$.example.com.
<pre>
Save & Exit.
BIND ZONE FILES CHECK CMD’s
Every time you edit the zone files, its better to run a checkzone cmd to ensure there are no syntax mistakes.
- a) Main File Syntax Check
named-checkconf
If your named configuration files have no syntax errors, there won’t be any error messages and you will return to your shell prompt. If there are problems with your configuration files, review the error message , troubleshoot & fix it, then try named-checkconf again
- b) Zone File Syntax Check
named-checkzone example.com /etc/bind/zones/forwarder.example.com

named-checkzone example.com /etc/bind/zones/reverse.example.com
** Configuration files for BIND9 – SLAVE **
Configuring SLAVE is quite simple. Install the BIND on 2nd server (ns2.example.com). set its resolv.conf to its own ip. Edit below files
NOTE: You have to define all Forwarder/Reverse ZONES defined in MASTER ns1 server in this config
nano /etc/bind/named.conf.local
Example File:
//The following code defines the forwarder lookup zone.
zone "example.com" {
type slave;
masters { 10.0.0.1; };
masterfile-format text;
file "/var/cache/bind/forwarder.example.com";
serial-update-method unixtime;
};

//The following code defines the reverse lookup zone.
zone "0.0.10.in-addr.arpa" {
type slave;
masters { 10.0.0.1; };
masterfile-format text;
file "/var/cache/bind/reverse.example.com";
serial-update-method unixtime;
};
Save & Exit.
Now edit the /etc/bind/named.conf.options & copy paste all data from master ns1 named.conf.options file. You have to modify just one parameter listen-on to point it to ns2 ip example
- listen-on { 10.0.0.2; };
Save & Exit. & restart BIND
service bind9 restart
now look at syslog file to check for any errors
tail -f /var/log/syslog
Sep 26 06:48:06 ns2 named[8496]: client 10.0.0.1#55064: received notify for zone 'example.com'
Sep 26 06:48:06 ns2 named[8496]: zone example.com/IN: notify from 10.0.0.1#55064: zone is up to date
Sep 26 06:48:07 ns2 named[8496]: client 10.0.0.1#44867: received notify for zone '0.0.0.10.in-addr.arpa'
Sep 26 06:48:07 ns2 named[8496]: zone 0.0.0.10.in-addr.arpa/IN: notify from 10.0.0.1#44867: zone is up to date
BIND Service Related CMD’s
*** Find BIND version CMD
named -v
*** BIND Service related CMD's
service bind9 stop
service bind9 start
service bind9 restart
service bind9 status
*** BIND Service Internal STATS
rndc status
RNDC Result Example: version: BIND 9.10.3-P4-Ubuntu <id:ebd72b3> (syed.jahanzaib) boot time: Wed, 19 Oct 2022 10:18:47 GMT last configured: Wed, 19 Oct 2022 10:18:47 GMT CPUs found: 16 worker threads: 16 UDP listeners per interface: 8 number of zones: 115 debug level: 0 xfers running: 0 xfers deferred: 0 soa queries in progress: 0 query logging is OFF recursive clients: 28/9900/10000 tcp clients: 14/1000 server is up and running [/sourcecode]
NSLOOKUP Test: (Windows)
nslookup -query=any example.com
nslookup -query=ns example.com
nslookup -query=soa example.com
nslookup -query=mx example.com
nslookup -10.0.0.1 example.com
nslookup -10.0.0.1 yahoo.com
DIG Test: (Linux)
Perform nslookup/dig on dns server
dig @127.0.0.1 ns1.example.com
dig @127.0.0.1 ns2.example.com
dig -x 10.0.0.1
dig example.com @10.0.0.1 | grep -e "^host" -e ";; flags"
dig +norec example.com @10.0.0.1 | grep -e "^host" -e ";; flags"
dig +norec example.com @10.0.0.1 | sed -n -e '/;; flags/p' -e '/^;; AUTH/,/^$/p'
dig +noall +answer SOA +multi example.com
TIPS:
- SERIAL of SOA
The serial number of the SOA record is very important to the correct operation of slave servers. Each time you edit your zone, the serial number must be increased so that the slave server can detect that the zone has been updated. Whenever the slave server notices that the serial number has changed, it performs a zone transfer and updates its cached zone file.
Every time, you make any changes in MASTER NS zone file, Ensure following
- Change Serial Number , else it will not be replicated to Slave.
- Reload bind by
service bind9 reload
- Auto Generation of PTR Records pointing to fixed generated IP-Hostname
If we want to reply the reverse PTR records automatically for our unused IP’s, Edit the REVERSE zone & add following line in the end
$GENERATE 1-255 $ IN PTR 10-11-11-$.example.com.
Save & Exit, & Reload BIND9 service by
service bind9 reload
now if you do nslookup for any unused ip/record from your user pool, you will get results as below
#10.0.0.1 is our NS server, and 10.0.0.50,100 are host whose record is not manually added,

C:\>nslookup 10.0.0.50 10.0.0.1
Server: ns1.example.com
Address: 10.0.0.1

Name: 101-11-11-50.example.com
Address: 10.0.0.50

C:\>nslookup 10.0.0.100 10.0.0.1
Server: ns1.example.com
Address: 10.0.0.1

Name: 101-11-11-100.example.com
Address: 10.0.0.100
- BASH Script to change ZONE SERIAL number with YYMMDDnn format
If you have Master/Slave Setup, then you need to update the serial number in zones every time you make any modifications, else it will not replicate to SLAVE. A bash script is handy to run when you update any record, it will update serial to YYMMDDSS (SS=sequence Serial) number, and will increment the SS every time u run it. so total of 99 changes u can make in single date.
Old Serial Number can be any number but the script will change it to current date like YYYYMMDDSS, example shown afterwards
- /temp/reload.sh
- NOTE: This bash script looks in /etc/bind/zones, and will search text ‘Serial’, So make sure your zone file contains ; Serial word in zone file. Example below
$TTL 86400 ; (1 day)
; $ORIGIN example.com
@ IN SOA ns1.example.com. admin (
2022092623 ; Serial
14400 ; refresh (4 hours)
1800 ; retry (30 minutes)
1209600 ; expire (2 weeks)
3600 ; minimum (1 hour)
)
Bash Script named /temp/reload.sh
#!/bin/bash
# This path contains all ZONES files, this is folder created specifically to hold ZONES files
ZONES_PATH="/etc/bind/zones"
DATE=$(date +%Y%m%d)
# we're searching for line containing this comment
NEEDLE="Serial"
for ZONE in $(ls -1 $ZONES_PATH) ; do
curr=$(/bin/grep -e "${NEEDLE}$" $ZONES_PATH/${ZONE} | /bin/sed -n "s/^\s*\([0-9]*\)\s*;\s*${NEEDLE}\s*/\1/p")
# replace if current date is shorter (possibly using different format)
if [ ${#curr} -lt ${#DATE} ]; then
serial="${DATE}00"
else
prefix=${curr::-2}
if [ "$DATE" -eq "$prefix" ]; then # same day
num=${curr: -2} # last two digits from serial number
num=$((10#$num + 1)) # force decimal representation, increment
serial="${DATE}$(printf '%02d' $num )" # format for 2 digits
else
serial="${DATE}00" # just update date
fi
fi
/bin/sed -i -e "s/^\(\s*\)[0-9]\{0,\}\(\s*;\s*${NEEDLE}\)$/\1${serial}\2/" ${ZONES_PATH}/${ZONE}
echo "${ZONE}:"
grep "; ${NEEDLE}$" $ZONES_PATH/${ZONE}
done
# In the END, reload and show status of BIND service
service bind9 reload
service bind9 status | grep running
service bind9 status
Result: After modifying any record, run this script. every time you run the script, it will just increment one number in last 2 digits, (it can be max of 99 till the SOA expires, or single day)
root@ns1:/etc/bind/zones# /temp/test.sh
forwarder.example.com:
2022092604 ; Serial
reverse.example.com:
2022092604 ; Serial

root@ns1:/etc/bind/zones# /temp/test.sh
forwarder.example.com:
2022092605 ; Serial
reverse.example.com:
2022092605 ; Serial
I have tagged this file with webmin, so that when user edit the record file and hit save and close, this file runs and do the job, and all data gets replicate to the SLAVE automatically. Also you schedule it to hourly or as per requirements.
- SLAVE ZONE FILES RAW FORMAT
With BIND 9.9.x, the slave zone files are now saved in a default raw binary format. This was done to improve performance, but at the sacrifice of being able to easily view the contents of the files. it can also make debugging at SLAVE level more difficult. If you want to see the slave zone files in plain text, just simple add following in the the named.conf files for your slave zones to include the line: (This has to be done at MASTER/NS1 dns)
masterfile-format text;
- REDUCE LOGGING FOR BIND9
BIND uses syslogd before a valid logging clause is available so named.conf parse errors and other information will appear in /var/log/syslog. To separate log from SYSLOG & record them in separate file & fix the log size, you can add following in /etc/bind/named.conf.option at end,
logging{
channel bind9_zaib_log {
file "/var/lib/bind/bind.log" versions 3 size 5m;
severity info;
print-time yes;
print-severity yes;
print-category yes;
};
category default{
bind9_zaib_log;
};
};
now reload BIND9 service
service bind9 reload
check the file contents
tail -f /var/lib/bind/bind.log
Once the file size will cross 5 MB, it will reset to 0 auto and will continue to grow till 5 & reset again 🙂 as shown in below image …
root@ns1:/etc/bind# ls -lh /var/lib/bind/bind.log
-rw-r--r-- 1 bind bind 4.2M Sep 27 11:29 /var/lib/bind/bind.log
root@ns1:/etc/bind# ls -lh /var/lib/bind/bind.log
-rw-r--r-- 1 bind bind 4.2M Sep 27 11:29 /var/lib/bind/bind.log
root@ns1:/etc/bind# ls -lh /var/lib/bind/bind.log
-rw-r--r-- 1 bind bind 4.2M Sep 27 11:30 /var/lib/bind/bind.log
root@ns1:/etc/bind# ls -lh /var/lib/bind/bind.log
-rw-r--r-- 1 bind bind 4.3M Sep 27 11:30 /var/lib/bind/bind.log
root@ns1:/etc/bind# ls -lh /var/lib/bind/bind.log
-rw-r--r-- 1 bind bind 4.3M Sep 27 11:30 /var/lib/bind/bind.log
root@ns1:/etc/bind# ls -lh /var/lib/bind/bind.log
-rw-r--r-- 1 bind bind 13K Sep 27 11:31 /var/lib/bind/bind.log
For more customized info, Please read below …
Different Types of DNS Records With Syntax and Examples
Types of DNS Records
A
AAAA
CNAME
MX
PTR
NS
SOA
SRV
TXT
NAPTR
The above DNS records are mostly used in all DNS Configurations.
A Record Example
Address Record, assigns an IP address to a host, domain or subdomain name
ns1 IN A 10.0.0.1
PTR Record Example
A PTR record or pointer record maps an IPv4 address to the canonical name for that host. This is mostly used as a security and an anti-spam measure wherein most of the webservers or the email servers do a reverse DNS lookup to check if the host is actually coming from where it claims to come from. It is always advisable to have a proper reverse DNS record (PTR) is been setup for your servers especially when you are running a mail / smtp server.
255 IN PTR ns1.example.com.
SPF Record Example
The Sender Policy Framework (SPF) is an email-authentication technique which is used to prevent spammers from sending messages on behalf of your domain. With SPF an organization can publish authorized mail servers. Together with the DMARC related information, this gives the receiver (or receiving systems) information on how trustworthy the origin of an email is. SPF is, just like DMARC, an email authentication technique that uses DNS (Domain Name Service). This gives you, as an email sender, the ability to specify which email servers are permitted to send email on behalf of your domain.
v=spf1 +a +mx +ip4:1.2.3.4 +include:mail.example.com -all
DMARC Record Example
_dmarc.example.com. 14400 TXT "v=DMARC1; p=quarantine; sp=none; rf=afrf; pct=100; ri=86400"
DKIM (MultiLine) Record Example
default._domainkey.example.com. 14400 TXT ( "v=DKIM1; k=rsa; p=GIIBgjANBgkqhkiG9w0BAQEFAAOCAQ8AMIIBCgKCAQEAzEi2OVswNjDwG57Rc14vKSAZNizQpO/KRG96H2N3dc1jnEMi0GCXCIFlFnrQffEVA9RWQ4u6pFjhaQ4s/Uony61CmPwls/O5p/IMdKbmkb0ULrdtwkpoW5Ve0F4C777YXBlXk0aTP2sEenX5e4ou8IGog0zTyq4E5v6DY+juNCKE8yktvM2oJvso/mqS2BJc5"
"X+Xvrhs+l3/qqlLEIwIfA4ep2QBXEOIgElBiXptXSwt6ym6ZmBdOl/eeZipulBZyC1onGFLwR5qvRNo/Q0e1c/H9eBrOyOmIJ65OPy8AtT1Ln3emKy9JAdAVaODHTt1jRbK2X8j3t/cAWX7Fntr1QIDAQAB;" )


