Syed Jahanzaib – Personal Blog to Share Knowledge !

September 29, 2011

Howto Create HTTP File Sharing Server with Freeradius Backend + [Daloradius Frontend Optional]

Filed under: Linux Related, Mikrotik Related — Tags: , , , , , — Syed Jahanzaib / Pinochio~:) @ 2:06 PM


Following is a complete guide on howto setup Apache to use FreeRadius authentication module along with DALORADIUS as a front-end. You can also use this guide to create full featured RADIUS server for your MIKROTIK or any other NAS which have external RADIUS authentication support in it.
Also this guide will illustrate you howto configure DALORADIUS. which is an advanced RADIUS web management application aimed at managing hotspots and general-purpose ISP deployments. It features user management, graphical reporting, accounting, a billing engine. It  is basically an nice GUI Frontend to control FREERADIUS. Using DR, you can create single/batch users, hotspot tickets, create plans n packages etc etc.

In the end I will show you howto create a APACHE base file sharing server which will use FREERADIUS for authentication 🙂

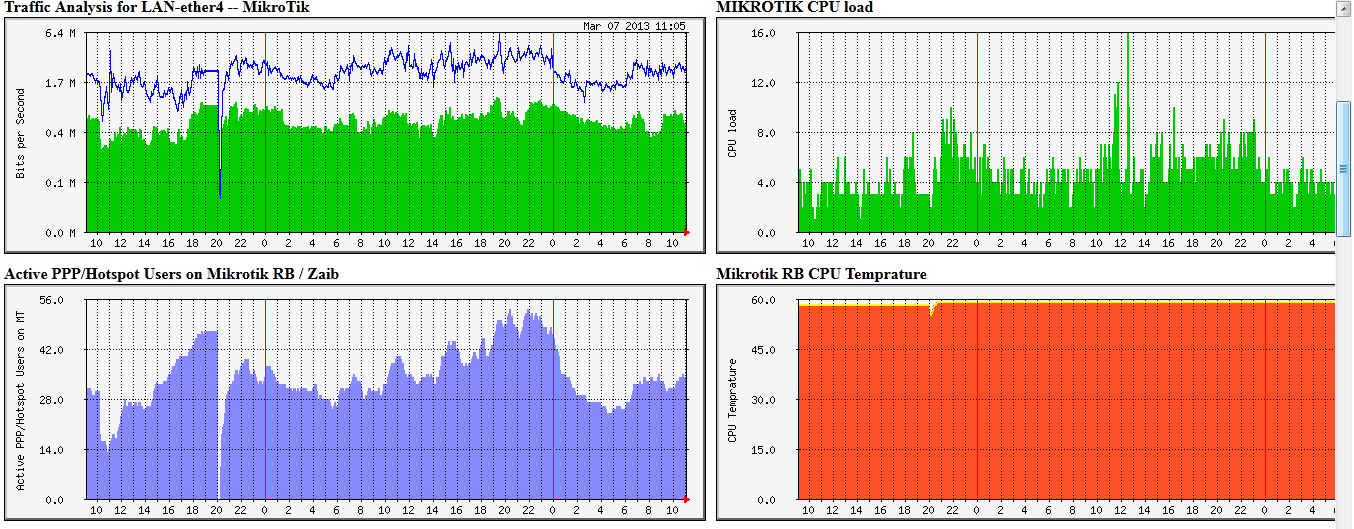
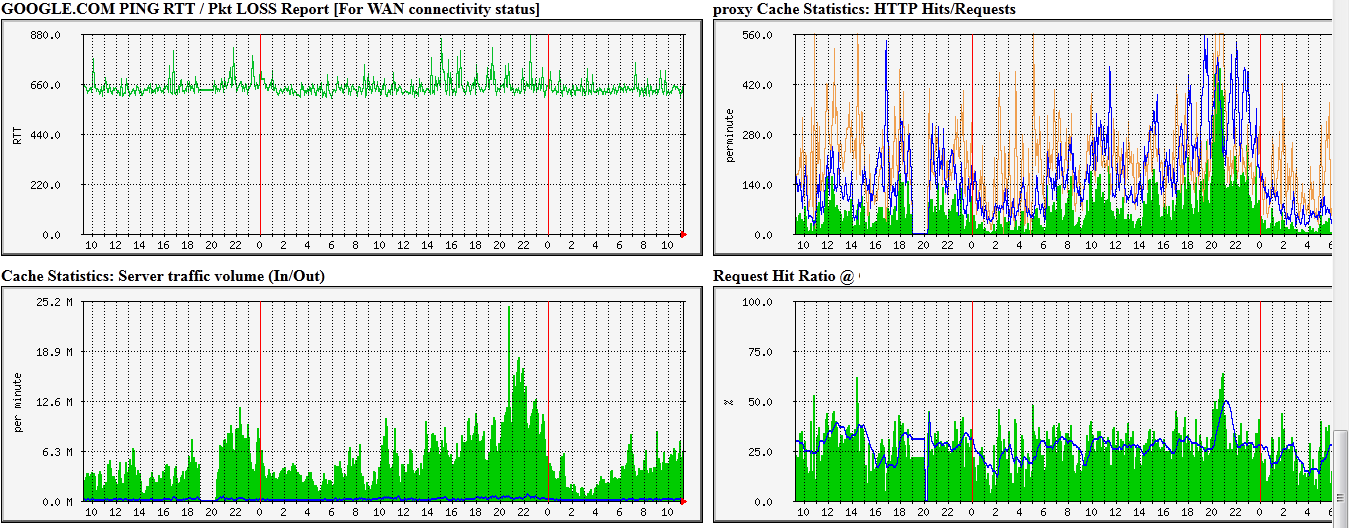
Few months back , @ my friend’s cable.network , I installed  Mikrotik along with DMASOFTLAB RADIUS MANAGER which also uses FREERADIUS as backend authentication mechanism. They also had a 4 TB of windows IIS base FTP sharing server for Videos, Mp3, Games and etc for LAN users. All network was running on private ips, so setting authentication on sharing server so only valid users can access FTP was a headache, so for the time being I placed FTP server behind Mikrotik DMZ so that only pppoe dialer connected users can access them, BUT this topology had a negative impact on overall Mikrotik performance because huge amount of (JUNK FTP) irrelevant traffic was going through the router which was increasing overall load on MT, so I decided to overcome this problem by changing the sharing server operating system from Microsoft Windows to UBUNTU Linux, and then I placed  it on users subnet and then link this sharing server [apache] authentication with freeradius. This way I managed to solve the problem. This guide will show you how I exactly did this.

Here we go . . .

We will divide this article in two categories.

1) FREERADIUS + MYSQL + DALORADIUS

2) How to authenticate Apache 2 with Radius

[Please note that I am using UBUNTU 10.4 and ip address is 192.168.2.1, all packages are installed in this single box for testing purpose,  you can separate them as per your requirements]

1) Installing FREERADIUS Server along with MYSQL+DALORADIUS :

I prefer installing the whole pre-requisite LAMP package (lamp-server stands for Linux-Apache-MySQL-PHP server). First We install lamp-server using the command below:

sudo tasksel install lamp-server

(you will need to enter root password, which is “123”  in my case , to continue the installation)

Now Install freeradius package

sudo apt-get install freeradius

Install freeradius ldap authentication

sudo apt-get install freeradius-ldap

Install freeradius to run with mysql

sudo apt-get install freeradius-mysql

After finishing the above installations, restart the FreeRADIUS service

sudo /etc/init.d/freeradius restart

If you are using Ubuntu, remove /commend the IPV6 entry from /etc/hosts

nano /etc/hosts
# The following lines are desirable for IPv6 capable hosts
# ::1     localhost ip6-localhost ip6-loopback

Now, you can test the Radius Server using radtest package, the command will be as below:

radtest radius 123 localhost 1812 123
(you will see its result something like below)
Sending Access-Request of id 198 to 127.0.0.1 port 1812
User-Name = "radius"  User-Password = "123" NAS-IP-Address = 127.0.1.1
NAS-Port = 1812 rad_recv: Access-Accept packet from host 127.0.0.1 port 1812, id=198, length=20
Which shows your RADIUS Server is in working condition. 

Now Download DALORADIUS which is hosted on sourceforge at the address of http://sourceforge.net/projects/daloradius/ and you may get the latest release from there ( I used 0.9.9) or use the wget command to download in any temp folder e.g /temp

mkdir /temp
cd /temp
wget http://citylan.dl.sourceforge.net/project/daloradius/daloradius/daloradius0.9-9/daloradius-0.9-9.tar.gz
tar -zxvf daloradius-0.9-9.tar.gz
mv daloradius-0.9-9.tar.gz daloradius
cp daloradius/ /var/www -R
chown www-data:www-data /var/www/daloradius -R chmod 644 /var/www/daloradius/library/daloradius.conf.php

MYSQL Database Setup

Now, we create the database for FreeRADIUS and an user account which will be used by FreeRADIUS to access into database. then import both freeradius and daloradius tables using this schema:
We will run the following command to Login MySQL Database

mysql -u root -p123
CREATE DATABASE radius;
grant all privileges on radius.* to 'radius'@'localhost';
quit

Now Import Daloradius mysql tables . . .

cd /var/www/daloradius/contrib/db/
mysql -u root -p radius < fr2-mysql-daloradius-and-freeradius.sql
mysql -u root -p radius < mysql-daloradius.sql

Database Connection SetupNow, simply adjust the MySQL database information in daloRADIUS’s config file.

cd /var/www/daloradius/library/
nano -w daloradius.conf.php
$configValues['FREERADIUS_VERSION'] = '2';
$configValues['CONFIG_DB_PASS'] = '123';
$configValues['CONFIG_DB_TBL_RADUSERGROUP'] = 'radusergroup';

Freeradius + mysql + daloradius Installation Complete.
Point your browser to

http://192.168.2.1/daloradius

Login to the management:

username: administrator
password: radius

Here you can add users / plans etc etc. Please see daloraidus web site for more support info. Add some test users so that you test it later when apache ask authentication.
You can also test this user with radtest.

radtest testuser testpassword localhost 1812 123

How to authenticate Apache 2 with RADIUS.

First we will install Apache radius module :

apt-get install libapache2-mod-auth-radius
a2enmod auth_radius

Now open /etc/apache2/apache2.conf and add the following lines to end of file,

AddRadiusAuth localhost:1812 123 5:3
AddRadiusCookieValid 1

Now For example we have mounted our 1 TB sharing Harddisk in /mnt/test and we want that if user try to open http://192.168.2.1/test in there browser , an Authentication Popup must appear to force user enter there valid radius user id password to further proceed, then Add the following lines in /etc/apache2/apache2.conf  in the end.

Alias /test /mnt/test
<Directory /mnt/test>
Options Indexes FollowSymlinks
AuthType Basic
AuthName "AA File Server Authentication"
AuthBasicAuthoritative Off
AuthBasicProvider radius
AuthRadiusAuthoritative on
AuthRadiusActive On
Require valid-user </Directory>


Now Point your browser to http://192.168.2.1/test and you will see authentication popup window , something like below image.


If the user supply wrong id password, he will see


If user enters valid id password, he will see the content of test folder.

Alhamdolillah 🙂
Allah Hafiz,

Regard’s
SYED JAHANZAIB

September 27, 2011

Howto create Windows 7 PPPoE Dialer Installer Package using Auto-iT !


PPPoE Dialer Package Sample

THIS IS SOME OLD CODE AND MAY NOT WORK PROPERLY NOW. KINDLY LOOK FOR SOME OTHER SOLUTION. JUST READ IT FOR INFORMATION PURPOSE ONLY BUT IT WILL NOT SERVE ANY GOOD TO YOU I GUESS

THIS IS SOME OLD CODE AND MAY NOT WORK PROPERLY NOW. KINDLY LOOK FOR SOME OTHER SOLUTION. JUST READ IT FOR INFORMATION PURPOSE ONLY BUT IT WILL NOT SERVE ANY GOOD TO YOU I GUESS

THIS IS SOME OLD CODE AND MAY NOT WORK PROPERLY NOW. KINDLY LOOK FOR SOME OTHER SOLUTION. JUST READ IT FOR INFORMATION PURPOSE ONLY BUT IT WILL NOT SERVE ANY GOOD TO YOU I GUESS


Following is a guide on howto to create Windows 7 PPPoE DIALER Installer Package.  It is based on same principles as my previous Winxp PPPoE Dialer Script.

Being a Linux Lover, I am publishing these codes under GPL (General Public License). You can modify it as per your requirements, redistribute it. Don’t forget to give credit if it helps you :~) Remember it’s not a standard, neat and clean way but It’s very simple and it do the job nicely:)

This script is made for Windows 7 Operating System Only, For windows XP/200x, please follow the below link.
https://aacable.wordpress.com/2011/09/01/howto-create-pppoe-dialer-installer-package-using-auto-it/

Following functions will be performed.

# First it will ask you if you want to continue to install the Dialer.
# Then it will minimize all opened Window to Let user focus the installation,
# Then it will show you the Logo in front(dialer.jpg which is customizable according to your need),
# in Background it will open the Network and sharing center and create new entry for pppoe dialer,
# After creating dialer, it will close the Logo and will show you the message that Dialer have been installed.

This is not fully final Script, Few things have been left intentionally, Following functions will not be performed.

# It will not check Duplicate entries. For example, If you have installed the dialer, and want to re.install it again, It will not check duplicate entries, and will stop on DUPLICATE NAME FOUND, So please Delete Previously Created Dialer with the same name.

Please check and Do Let me know the results.

I have checked It on Windows 7 several times and working fine. The speed of executing functions in program can be + or – in some cases, It can be tuned with the $DELAY variable.

So Here we go . . .

First of all you have to download ‘Auto-it‘ software from its website at

http://www.autoitscript.com/cgi-bin/getfile.pl?autoit3/autoit-v3-setup.exe

I used Latest version: v3.3.6.1, Do full installation of AutoiT.

After installation, launch it by  Goto Start / Programs / Autoit v3  and select SciTE Script Editor

Now an advance Notepad type windows will open, Just paste the following code in it.

(Note: FOR SOME REASONS, Sometimes CODE Does not displayed PROPERLY IN THIS BLOG, IF you face syntax errors,  you can copy the raw code from following location) http://pastebin.com/BhNSMeKx

#cs ----------------------------------------------------------------------------
AutoIt Version : 3.3.6.1
Author : SYED JAHANZAIB
Email : aacable@hotmail.com
Web : https://aacable.wordpress.com
Script Function: Template AutoIt script. for PPPoE Dialer Installer
OS Supported   : Windows 7
Dated          : 27/09/2011
#ce ----------------------------------------------------------------------------
; Script Start - Add your code below here

$DELAY = 300
$answer = MsgBox(4, "PPPOE Connection", "This script will create a PPPOE DIALER, Do you want to Continue?")
If $answer = 7 Then
Exit
EndIf

WinMinimizeAll ( )
; Put Logo in front and do installation in background, place dialer.jpg in the same folder
; From you have launched dialer.
SplashImageOn("Please wait Few Seconds While Installer Installs PPPoE Dialer ", "dialer.jpg", 800,650)

$COMPANY_NAME = ("Type Your pppoe service name here")
; Example $COMPANY_NAME = ("MY_ISP")
$DELAY = 300

; Run Windows 7 Network Setup
Run("control.exe /name Microsoft.NetworkAndSharingCenter")
Sleep($DELAY)

; Send TAB 7 times to Select 'setup a new connection'
Send("{TAB 7}")

; Send Enter to Launch 'setup a new connection'
Send("{ENTER}")

; Send Next to select 'Connect to Internet'
Sleep($DELAY)
Send("!n")

; Send 'S' to select 'Setup a new connection anyway
Sleep($DELAY)
Send("!s")

;Check Duplicate Connection ???

Sleep($DELAY)
Send("!n")

; Send 'r' to select 'Broadband PPPoE'
Sleep($DELAY)
Send("!r")

; Send TAB 4 times to Enter 'ISP NAME'
Sleep($DELAY)
Send("{TAB 4}")
Send($COMPANY_NAME)
Sleep($DELAY)

; Send 'c' to connect $COMPANY_NAME service to contiue further
Sleep($DELAY)
Send("!c")

; Send 's' to skip connect '$comapany name' service to contiue further
Sleep($DELAY)
Send("!s")

; Send 'c' to close.
Sleep($DELAY)
Send("!c")

WinClose("Network Connections")
Run("control.exe /name Microsoft.NetworkAndSharingCenter")
Sleep($DELAY)
Send("!F")
Send("c")
SplashOff ( )
Sleep($DELAY)
Run("control ncpa.cpl")
WinWaitActive("Network Connections")
Sleep($DELAY)
;send ( "!{TAB}" )
Sleep($DELAY)
MsgBox(0, "Setup Complete", "Your Dialer have been installed , Click Connect on  " & $COMPANY_NAME & " to initiate Dialing")

Now Open File / Save and name it ‘pppoe-win7-dialer-installer’

Now your script with source code is ready to be compiled in .EXE executable format so any user can install it like any other normal application.

Now Open Tools and click on ‘Compile’ and it will compile the script in .exe format and it will save it to the Desktop or whatever Path You have selected.

Now click on pppoe-win7-dialer-installer.exe and it will install the pppoe dialer and place its shortcut on Desktop. Its always better to test the script fully before compiling it, as compilation is done when your program is fully tested and good to go.

Any suggestions on improvements and enhancements / advancements are most welcome and will be appreciable

Regard’s
SYED JAHANZAIB

September 24, 2011

HOWTO CREATE MRTG STATS GRAPHS FOR FOR COUNTER STRIKE SERVER USER USAGE


This slideshow requires JavaScript.

As I am obsessed with MRTG, I have also found a way to graph Counter strike users. To graphs Counter Strike users via  MRTG, we will need a script name kkcron.pl , you can download it from http://kkrcon.sourceforge.net/
Untar it inany folder.

Now set the rcon password on your cs server by using this command on CS Server console.

rcon_password 12345678

Now test the kkcron.pl by following command to make sure its giving us the required data before going furhter.

/temp/kk/kkrcon.pl -a 192.168.2.5 -p 27015 -t new 12345678 status |grep players | cut -c12

Result woule be some thing like below (If the users are playing on  the server, if no user is connected you will surely get 0 )

17

(Which means 17 usesr are connected with your CS Server)

Now everything is ready, use the Use the following cs.cfg example , that you can use to graph the C.S users with the help of kkcron.pl

#cs.cfg
# Total CS Users
Target[cs.users]: '/temp/kk/kkrcon.pl -a 192.168.2.5 -p 27015 -t new 12345678 status |grep players | cut -c12'
Title[cs.users]: CS Logged in Users
PageTop[cs.users]: <H1> CS Logged in Users </H1>
MaxBytes[cs.users]: 300
Colours[cs.users]: B#8888ff,B#8888ff,B#5398ff,B#5398ff
Options[cs.users]: gauge,nopercent,noo,integer,growright
LegendI[cs.users]: CS Logged in Users
LegendO[cs.users]:
YLegend[cs.users]: CS Logged in Users
Legend1[cs.users]: CS Logged in Users
Legend2[cs.users]:
Unscaled[cs.users]: ymwd
Counter Strike MRTG Graphs / aacable@hotmail.com
Regard's
SYED JAHANZAIB

September 21, 2011

Howto Monitor Linux using MRTG !


INSTALLATION OF MRTG IN UBUNTU AND MONITOR LINUX DISK MEMORY AND PING GRAPHS

[Advance Monitoring]

~!~ Article By Syed Jahanzaib ~!~

mrtg-1
mrtg-2
mrtg-3
mrtg-4

The Multi Router Traffic Grapher (MRTG) is a tool to monitor the traffic load on network links. MRTG generates HTML pages containing PNG images which provide a LIVE visual representation of this traffic.MRTG is not limited to monitoring traffic, though. It is possible to monitor any SNMP variable you choose. You can even use an external program to gather the data which should be monitored via MRTG. People are using MRTG, to monitor things such as System Load, Login Sessions, and about anything . MRTG even allows you to accumulate two or more data sources into a single graph. I have used MRTG to monitor everything on my network, whether its a switch, router, ports, isa server counters, windows counters, linux counters, harddrive space monitoring, etc etc.


I HAVE PASTED THE SAMPLE WORKING CFG FILES AT THE END. JUST FOR REFERENCE.

Now we will move on to howto install MRTG. If you have Freshly installed UBUNTU , You need to install Web Server (apache2)

apt-get install apache2

Now we will install MRTG

apt-get install mrtg

(Choose Yes to continue)

Now we will install SNMP Server and other SNMP utilities so that web can collect information for localhost and remote pcs via snmp.

apt-get install snmp snmpd

Now set your community string in /etc/snmp/snmpd.conf , Remove all Lines and add the following line only.

nano /etc/snmp/snmpd.conf

rocommunity public
syslocation "Karachi NOC, Paksitan"
syscontact  aacable@hotmail.com

Save and exit.

now edit /etc/default/snmpd

nano /etc/default/snmpd

and change following

# snmpd options (use syslog, close stdin/out/err).
SNMPDOPTS='-Lsd -Lf /dev/null -u snmp -I -smux -p /var/run/snmpd.pid'

To THIS:

# snmpd options (use syslog, close stdin/out/err).
# SNMPDOPTS='-Lsd -Lf /dev/null -u snmp -I -smux -p /var/run/snmpd.pid '
SNMPDOPTS='-Lsd -Lf /dev/null -u snmp -I -smux -p /var/run/snmpd.pid -c /etc/snmp/snmpd.conf'

and restart snmpd

/etc/init.d/snmpd restart

OR

service snmpd restart

If you want to have MIBS, use following

Now download MIBs (which will be used to query counters by name)

sudo apt-get install snmp-mibs-downloader

Copy all mibs in any single folder like /cfg/mibs/

mkdir /cfg
mkdir /cfg/mibs
cp /var/lib/mibs/ietf/* /cfg/mibs

NOTE: Make sure you remove .txt or add .txt in every mib , and use the name in mrtg.cfg accordingly. This is required if you want to use names instead of numeric values 😀

This was the issue for which I was stuck for many hours 😦

E.g:
#LoadMIBs: /cfg/mibs/UCD-SNMP-MIB

OR following if files are in .txt, then use following
#LoadMIBs: /cfg/mibs/HOST-RESOURCES-MIB.txt

Testing SNMP Service for localhost.

Now snmp service have been installed, its better to do a snmpwalk test from localhost or another remote host to verify our new configuration is responding correctly. issue the following command from localhost terminal.

snmpwalk -v 1 -c public 127.0.0.1


and you will see lot of oids and information which confirms that snmp service is installed and responding OK.

Adding MRTG to crontab to run after very 5 minutes

If already not added in /etc/cron.d/ folder, then you can add it manually in crontab

crontab -e

(if it asks for preferred text editor, go with nano, its much easier)

now add following line (Make sure to adjust /etc/mrtg.cfg location,

*/5 * * * * env LANG=C mrtg /etc/mrtg.cfg --logging /var/log/mrtg.log


Some tips for INDEX MAKER and running MRTG manually …

Following is the command to create CFG file for remote pc.

cfgmaker public@192.168.100.1 > test.cfg

Following is the command to check remote pc snmp info

snmpwalk -v 1 -c public 192.168.100.1

Following is the command to create index page for your cfg file.

indexmaker /etc/mrtg.cfg -output /var/www/mrtg/index.html -columns=2

Following is the command to run MRTG to create your graph file.

env LANG=C mrtg /etc/mrtg.cfg


MIKROTIK WORKING CFG EXAMPLES FOR MRTG , JUST FOR REFERENCE

You can create graphs for about any thing you like. Its really powerful and I always prefer MRTG over other easy applications like CACTI or others. You can modify it as you like.

I will add more MRTG details on howto monitor linux / Microsoft / MIKROTIK soon.
MRTG WORKING CFG EXAMPLES, JUST FOR REFERENCE

#########################
# START OF /etc/mrtg.cfg#
#########################
# AUthor: Syed Jahanzaib
# Email : aacable@hotmail.com
# Web : https://aacable.wordpress.com

WorkDir:/var/www/mrtg
Options[_]: growright,nobanner,logscale,pngdate,bits
Options[^]: growright,nobanner,logscale,pngdate,bits
XSize[_]: 600
YSize[_]: 200
EnableIPv6: no
RunAsDaemon: no
Interval: 5
#Logformat: rrdtool
#Use MIBS as per your local config
LoadMIBs: /cfg/mibs/HOST-RESOURCES-MIB /cfg/mibs/IF-MIB /cfg/mibs/UCD-SNMP-MIB
PageFoot[^]: Page managed by SYED JAHANZAIB
AddHead[_]:   
Background[_]: #F6F1EE

# Change it as required , it means mrtg will read following file and will create graphs based on its contents

Include: /cfg/lanwan.cfg
Include: /cfg/mt.cfg
Include: /cfg/radius.cfg
Include: /cfg/ping.cfg
Include: /cfg/vlan.cfg

#########################
# END OF /etc/mrtg.cfg #
#########################


Following cfg will query memory and disk space by MIB name, its easier to query via mib name, rather then long OID number.


to get the last number of OID (which nee to be replace for almost every different system, use following command)

To get DISK LAST OID number

snmpwalk -v1 -c public 192.168.100.1 -m /cfg/mibs/HOST-RESOURCES-MIB |grep hrStorageDescr

HOST-RESOURCES-MIB::hrStorageDescr.1 = STRING: Physical memory
HOST-RESOURCES-MIB::hrStorageDescr.3 = STRING: Virtual memory
HOST-RESOURCES-MIB::hrStorageDescr.6 = STRING: Memory buffers
HOST-RESOURCES-MIB::hrStorageDescr.7 = STRING: Cached memory
HOST-RESOURCES-MIB::hrStorageDescr.8 = STRING: Shared memory
HOST-RESOURCES-MIB::hrStorageDescr.10 = STRING: Swap space
HOST-RESOURCES-MIB::hrStorageDescr.31 = STRING: /
HOST-RESOURCES-MIB::hrStorageDescr.32 = STRING: /sys/fs/fuse/connections
HOST-RESOURCES-MIB::hrStorageDescr.33 = STRING: /dev
HOST-RESOURCES-MIB::hrSWRunParameters.29273 = STRING: "--color=auto hrStorageDescr"
root@ubuntu:/cfg#

Now look for / , which have hrStorageDescr.31 , so the disk oid  we need to query is .31

and for memory use following

snmpwalk -v1 -c gt 192.168.100.1 -m /cfg/mibs/HOST-RESOURCES-MIB |grep memory

# and you will get following results...

HOST-RESOURCES-MIB::hrStorageDescr.1 = STRING: Physical memory

as can see .1 is the memory index key that you need to use in thw following


# Start of other CFG files


# disk space monitoring for / partition. you can query it via snmpwalk
Target[linux_server]: ( hrStorageUsed.31&amp;hrStorageUsed.31:public@192.168.100.1 ) * 100 / ( hrStorageSize.31&amp;hrStorageSize.31:public@192.168.100.1 )
Title[linux_server]: Disk usage for Radius Manager Linux Server
PageTop[linux_server]: <H1> Disk usage for Radius Manager Linux Server </H1>
MaxBytes[linux_server]: 100
ShortLegend[linux_server]: %
YLegend[linux_server]: % of RM_DISK
Legend1[linux_server]: Used RM_DISK
LegendI[linux_server]: Used :
LegendO[linux_server]:
Options[linux_server]: nopercent, gauge, integer
Unscaled[linux_server]: ymwd

#Percent of memory used
Target[radius_server_mem_ram]: ( hrStorageUsed.1&amp;hrStorageUsed.1:public@192.168.100.1) * 100 / ( hrStorageSize.1&amp;hrStorageSize.1:public@192.168.100.1)
Title[radius_server_mem_ram]: Memory usage for Radius Server
PageTop[radius_server_mem_ram]: <H1> Memory usage for Radius Server </H1>
MaxBytes[radius_server_mem_ram]: 100
ShortLegend[radius_server_mem_ram]: %
YLegend[radius_server_mem_ram]: % of Memory
Legend1[radius_server_mem_ram]: Used Memory
LegendI[radius_server_mem_ram]: Used :
LegendO[radius_server_mem_ram]:
Options[radius_server_mem_ram]: nopercent, gauge, integer, growright
Unscaled[radius_server_mem_ram]: ymwd

PING GRAPHS SCRIPTS

### ping.cfg
# 192.168.100.2 MIKROTIK NAS SERVERPING GRAPH
Title[mikrotik.ping]: MIKROTIK NAS SERVER PING RTT / Pkt LOSS Report
PageTop[mikrotik.ping]: <H1>MIKROTIK NAS SERVER PING RTT / Pkt LOSS Report</H1>
Target[mikrotik.ping]: `/cfg/norping.sh 192.168.100.2`
Colours[mikrotik.ping]: R#f75712,G#04bf27,G#70ff53,R#70ff53
MaxBytes[mikrotik.ping]: 100
AbsMax[mikrotik.ping]: 100
Options[mikrotik.ping]: growright,nopercent,gauge
LegendI[mikrotik.ping]: Pkt LOSS
LegendO[mikrotik.ping]: Active Round Trip Time
YLegend[mikrotik.ping]: RTT
Legend1[mikrotik.ping]: Pkt LOSS
Legend2[mikrotik.ping]: Active RTT

# Google PING GRAPH
Title[google.ping]: GOOGLE.COM PING RTT / Pkt LOSS Report
PageTop[google.ping]: <H1>GOOGLE.COM PING RTT / Pkt LOSS Report</H1>
Target[google.ping]: `/cfg/norping.sh google.com`
Colours[google.ping]: R#f75712,G#04bf27,G#70ff53,R#70ff53
MaxBytes[google.ping]: 1000
AbsMax[google.ping]: 1000
Options[google.ping]: growright,nopercent,gauge
LegendI[google.ping]: Pkt LOSS
LegendO[google.ping]: Active Round Trip Time
YLegend[google.ping]: RTT
Legend1[google.ping]: Pkt LOSS
Legend2[google.ping]: Active RTT

### ping.cfg
# 192.168.100.10 GT MAIN SWITCH PING GRAPH
Title[gtsw-core.ping]: GT CORE SWITCH PING GRAPH PING RTT / Pkt LOSS Report
PageTop[gtsw-core.ping]: <H1>GT CORE SWITCH PING RTT / Pkt LOSS Report</H1>
Target[gtsw-core.ping]: `/cfg/norping.sh 192.168.100.10`
Colours[gtsw-core.ping]: R#f75712,G#04bf27,G#70ff53,R#70ff53
MaxBytes[gtsw-core.ping]: 100
AbsMax[gtsw-core.ping]: 100
Options[gtsw-core.ping]: growright,nopercent,gauge
LegendI[gtsw-core.ping]: Pkt LOSS
LegendO[gtsw-core.ping]: Active Round Trip Time
YLegend[gtsw-core.ping]: RTT
Legend1[gtsw-core.ping]: Pkt LOSS
Legend2[gtsw-core.ping]: Active RTT


scripts for ping

norping.cfg (for normal ping for wan)

#!/bin/bash
HOST=$1
ping -c 3 $HOST > /dev/null
DATA=`ping -c 3 $1 -q `
if [ $? -eq 0 ]
then
echo "0"
echo $DATA | awk -F/ '{print $6 }'
else
echo "100
0"
fi

MYSQL Database size monitoring in MRTG using bash script

1# Bash file to output DB Size for mysql hosted locally on same server.

#!/bin/bash
# Script to query mysql stats
#set -x
HOST="127.0.0.1"
USER="root"
PASS="MYSQLPASS"
DB="radius"
CMD=`mysql -u$USER -pMYSQLPASS --skip-column-names -e "SELECT table_schema "radius", sum(data_length + index_length) FROM information_schema.TABLES WHERE table_schema='radius' GROUP BY table_schema;"`
F=`echo $CMD | cut -f1 -d"." | sed 's/[^0-9]*//g'`
echo $F
echo $F

2# Bash file to output DB Size for mysql hosted locally on REMOTE server using SSH key method.

#!/bin/bash
# Script to query mysql stats
#set -x
HOST="192.168.0.1"
USER="root"
PASS="PASS"
DB="radius"
PORT="55511"
CMD=`ssh -p $PORT $HOST mysql -uroot '-pMYSQLPASS' --skip-column-names -e '"SELECT' table_schema '"radius",' 'sum(data_length' + 'index_length)' FROM information_schema.TABLES WHERE 'table_schema='\''radius'\''' GROUP BY 'table_schema;"' | cut -f1 -d"." | sed 's/[^0-9]*//g'`
echo $CMD
echo $CMD


CFG Example:

Title[0.1_radius_db_size]: 192.168.0.1 - MYSQL RADIUS DB SIZE
Target[0.1_radius_db_size]: `/temp/qmysql.0.1.sh`
PageTop[0.1_radius_db_size]:
<h1>192.168.0.1 - MYSQL RADIUS DB SIZE</h1>
Kilo[0.1_radius_db_size]: 1024
MaxBytes[0.1_radius_db_size]: 10737418240
ShortLegend[0.1_radius_db_size]: B
YLegend[0.1_radius_db_size]: MB-or-GB
Legend1[0.1_radius_db_size]: Used
#Legend2[0.1_radius_db_size]: Total
LegendI[0.1_radius_db_size]: Used:
LegendO[0.1_radius_db_size]: Used:
Options[0.1_radius_db_size]: gauge,growright,nobanner,nopercent,integer,transparent,noo

Graph Example:

radius db


September 16, 2011

Howto Create Counter Strike 1.6 Dedicated Server For LAN [with PSYCHOSTATS Ranking +MRTG System]

Filed under: General IT Related, Linux Related, Microsoft Related — Syed Jahanzaib / Pinochio~:) @ 2:18 PM


COUNTER STRIKE 1.6 DEDICATED SERVER INSTALLATION TUTORIAL [FOR Windows]

Counter-Strike is a first-person shooter GAME in which players join either the terrorist or counter-terrorist team (or become a spectator). Each team attempts to complete their mission objective and/or eliminate the opposing team. I created its first server back in 2006/2007 for my Ex-Cyber Cafe/Cable.Network system. Till date C.S is the most popular and famous networking Action Game for all ages.

I am writing this guide so anyone can create this server with very minimum knowledge required.

First you need to install Counter Strike 1.6 on any version of Windows . Either from CD or local installation file, Install it in

c:\cstrike

After installation, goto command prompt

cd C:\cstrike

Now use the following command to create CS dedicated server

hlds.exe -console -game cstrike -autoupdate +maxplayers 32 +map de_aztec +log on -nomaster +svlan 1

Or its better to create a new shortcut on your Desktop with the following code,

c:\cstrike\hlds.exe -console -game cstrike -autoupdate +maxplayers 32 +map de_aztec +log on -nomaster +svlan 1

This way you can always Start the server with this shortcut, or you can place it in your windows startup so it will automatically run when windows starts.

Now a Very basic counter strike dedicated server is ready to use. User can connect to this server and play game with each other.

Now We will add some extra functionalities in CS for enhancements and entertainment to give it fully professionaly look 🙂
For this purpose we have to add some MODs.

First we will ADMINMOd.

Goto

http://www.adminmod.org/index.php?go=downloads#am

and downlaod halflife-admin-2.50.60-win.zip

After downloading, extract it in any folder.

Run install_admin.vbs , click OK to continue,

Now it will ask you to specify a full path where CS is installed, in our case its c:\cstrike , so type the full path like this
c:\cstrike\hl.exe

It will ask Modification Choice, Select 1
It will then install ADMIN MOD.

Now if you will start Counter strike server, you will see few more lines indicating that [META] and [ADMIN] tags which will indicate that ADMINMOD is installed correctly. you can use the following  file to modify ADMINMOD settings at

C:\cstrike\cstrike\addons\adminmod\config\adminmod.cfg

For example you print your banner advertisement via this line
admin_connect_msg “Welcome to the AA Net CS Dedicated Server
and many other cool things you can do with this like map voting etc etc.

Always RESTART the C.S after adding any addon to it, so changes can take effect properly.

Now we will add another ADDON name AMXMOD. Installing AMX MOD X for counter strike is quite easy, Just follow these easy steps to install it.

A step bys tep GUI guide is available at

http://techgulf.blogspot.com/2011/03/how-to-install-amx-mod-x-for-counter.html 

Download AMXMOD 1.8.1 from

http://sourceforge.net/projects/amxmodx/files/AMX%20Mod%20X%20Full/1.8.1/amxmodx-installer-1.8.1.exe/download

The version of AMX MOD X which I am using in this guide is V1.8.1. Install AMX MOD X like you do  install any other app. Upon finish put check mark on “RUN AMX MOD X INSTALLER 1.8.1” and click on Finish.
Now a new window will apear,
Click on Next,
Accept the license agreement and click Next,
In Local Installation select “Select Mod directory” and click on Next,

Now it will ask you to choose directory, point it to c:\cstrike\cstrike\
and in Custom Game Addon, Select COUNTER-STRIKE from drop down menu, now click OK
It will then install the AMXMOD-X.

Now if you start the CS server, you will notice AMX MOD X tags in various lines.

Congrats You have install AMX Mod too 🙂 You can edit it according to your requirments.
Its config files locations are.

C:\cstrike\cstrike\addons\AMX Mod X\files\cstrike\configs

****   PSYCHOSTATS INSTALLATION TUTORIAL [FOR Ubuntu/LINUX]   ****


What is PsychoStats ?

PsychoStats is open source software that creates comprehensive gaming statistics for players and clans. Allowing anyone with a webserver to have a website that shows detailed statistics and ranks for their single game server, or even multiple game servers! for examples Half.Life and Coutner.Strike

A sample ranking website can be viewed at

http://pro-css.co.il/stats/index.php?sort=skill&order=desc&limit=100&q=&start=71100

PsychoStats version 3.1 is very easy and quick to install on any system. It includes an online installation wizard that you run through your browser. Follow these simple steps and you’ll be up and running in few minutes.

Minimum Requirements

- PHP v4.3 (or 5.0+)
 - MySQL v4.1.11 (or v5.0+)
 - Perl v5.8
 - Required Perl modules
 - DBI
 - DBD::mysql

If you have fresh Linux, install PHP , Mysql and other using this article.
https://aacable.wordpress.com/2011/09/15/howto-install-phpbb-forum-on-ubuntu/

Step By Step Installation Process of Psychostats:

Login as root to your linux machine.
Create a new temp directory

mkdir /temp
 cd /temp

Now download Psychostats 3.1

wget http://www.psychostats.com/downloads/PsychoStats/psychostats3.1.tar.gz

Untar it.

tar zxvf psychostats3.1.tar.gz

Now create a new directory in your webserver name stats

mkdir /var/www/stats

Copy the psychostats Frontend Files to above folder so that you can start web base installation process. To do this, use the following command

cp -rf upload/* /var/www/stats/

Now its time to create MySQL Databas before start the installation.
Exectue the msyql program and create the following database.
mysql -u root -p123

create database stats;
 grant all privileges on stats.* to root@"localhost";
 flush privileges;
 exit

Now its time to Start the installation wizard process 🙂 To start the installation point your browser to use a URL like this:

http://192.168.2.9/stats/install/index.php

Now follow the below images to go complete the installation.


Now Edit the /var/www/stats/config.cfg with the proper database settings that you have create above , so PsychoStats can connect to your database.

Sample :

root@linux:/var/www/stats# cat config.php

<?php
 $dbtype = 'mysql';
 $dbhost = 'localhost';
 $dbport = '';
 $dbname = 'stats';
 $dbuser = 'root';
 $dbpass = '123';
 $dbtblprefix =  'ps_';
 ?>

Now point your browser to http://192.168.2.9/stats and you will see Psychostats main screen.

Running PsychoStats

At this point you have run the ‘Install Wizard‘ from your browser and the database is fully setup and you can view your empty player stats online. Now it’s time to finally generate some stats!

First copy the stats.pl, stats.cfg and lib/ directory to the /var/www/stats from the folder where you untar the psychostats installation file. in this case it it /temp/

cd /temp
cp -R lib/ /var/www/stats/
cp stats.cfg /var/www/stats/
cp stats.pl /var/www/stats/ cd /var/www/stats

Now edit the stats.cfg and Enter the MYSQL DB details that we have entered before. Its necessary to run stats.pl correctly

Now execute the main stats.pl to generate your statistics.

./stats.pl -v

Note the added command line option ‘-v’. This enables ‘verbose’ mode and will cause some extra feedback while the stats are processing. This is recommended the first time you run it so you can see what is happening

Automatic Scheduling of PsychoStats

Now that you’ve run the stats.pl at least once and have confirmed that you are getting statistics on your website you’ll most likely want to setup PsychoStats to run automatically. PsychoStats does not have built in functionality to run itself. So in order to do this you need to add it in Linux CRON.

Run crontab and it will open up your default

crontab -e

Simply enter the following line

0,30 * * * * /var/www/stats/stats.pl

Save the file and exit. This will run stats.pl every 30 minutes

HOWTO CREATE MRTG STATS FOR FORCOUNTER STRIKE USER USAGE

As I am obsessed with MRTG, I have also found a way to graph Counter strike users. To graphs cs users, we will need a script name kkcron.pl ,
you can download it from http://kkrcon.sourceforge.net/after untar it , Now set the rcon password on your cs server by using this command on CS Server console.

rcon_password 12345678

Now test the kkcron.pl by following command to make sure its giving us the required data before going furhter.

/temp/kk/kkrcon.pl -a 192.168.2.5 -p 27015 -t new 12345678 status |grep players | cut -c12

(For some reason, you may have to adjust the cut -c12 integer to match yours, use some common sense in this matter) Result woule be some thing like below 17 (Which means 17 usesr are connected with your CS Server) Now everything is ready, use the Use the following cs.cfg example , that you can use to graph the C.S users with the help of kkcron.pl

#cs.cfg
# Total CS Users
Target[cs.users]: '/temp/kk/kkrcon.pl -a 192.168.2.5 -p 27015 -t new 12345678 status |grep players | cut -c12'
Title[cs.users]: CS Logged in Users
PageTop[cs.users]: <H1> CS Logged in Users </H1>
MaxBytes[cs.users]: 300
Colours[cs.users]: B#8888ff,B#8888ff,B#5398ff,B#5398ff
Options[cs.users]: gauge,nopercent,noo,integer,growright
LegendI[cs.users]: CS Logged in Users
LegendO[cs.users]:
YLegend[cs.users]: CS Logged in Users
Legend1[cs.users]: CS Logged in Users
Legend2[cs.users]:
Unscaled[cs.users]: ymwd
Counter Strike MRTG Graphs / aacable@hotmail.com

Counter Strike MRTG Graphs / aacable@hotmail.com

~!~ ALL DONE ~!~

Congratulations, You’re all done. You should have a fully functional Counter Strike 1.6 Dedicated Server for LAN with PsychoStats User Ranking System with MRTG installation and all will automatically update themselves.

Regard’s
Syed Jahanzaib

September 15, 2011

Howto install phpBB Forum on Ubuntu

Filed under: Linux Related — Tags: , , , , , , , — Syed Jahanzaib / Pinochio~:) @ 2:31 PM

Following is a guide on howto install phpBB forum on freshly installed Ubuntu.
PhpBB is a web forum application which runs on apache, mysql and php. With it, you can host your own forum site.
Example of such forum is http://u-dear.com/forum


In this tutorial I use the hostname linux with the IP address 192.168.2.9
These settings might differ for you, so you have to replace them where appropriate.
You need the following components for the phpBB forum.

Pre-Requisite for phpBB3 Forum:

1) Mysql
2) Apache
3) Php

After configuring your networking interface, Install the above mentioned components step by step. I’m running all the steps in this tutorial with root privileges, so make sure you’re logged in as root:

1. Installing MYSQL

apt-get install mysql-server mysql-client

You will be asked to provide a password for the MySQL root user – this password is valid for the user root@localhost

2. Installing APACHE2

Apache2 is available as an Ubuntu package, therefore we can install it like this:

apt-get install apache2

Now point your browser to http://192.168.2.9 and you should see the Apache2 placeholder page (It works!):

3. Installing PHP

We can install PHP5 and the Apache PHP5 module as follows:

apt-get install php5 libapache2-mod-php5

Now restart apache by following command

/etc/init.d/apache2 restart

Install Phpbb3

apt-get install phpbb3

The installation of that package will also install the phpbb3 package and perform all the database configuration for you. You will be prompted for the mysql root user password (not the same as the root user, but the mysql’s user named root)

Run this command to make the forum accessible through the web server

ln -s /usr/share/phpbb3/www /var/www/phpbb

/etc/init.d/apache2 restart

Now point your browser to http://192.168.2.9/phpbb

The PHPBB3 webpage should display that the forum is disabled.

Click Log in.

Use the default username and password:

username = admin
password = admin

Click on the small link at the bottom of the page – Administration Control Panel

  • Select the Board Settings link which is located under the sub heading Board Configuration on the left hand side of the page.
  • Set the option Disable Forum to No and click Submit at the bottom of the page.

Note: Also, Don’t forget to change the admin password as well.

Now you FORUM is ready, Enjoy !

Just create New categories and add appropriate permissions.  (Give users at least read+write permission for the forum)

September 12, 2011

September 11, 2011

Howto Add Internet Service Status Page for Local Users

Filed under: General IT Related, Mikrotik Related — Tags: , , — Syed Jahanzaib / Pinochio~:) @ 11:37 AM

If you want to provide users a internet service status page from where users can check the internet status whether its connected or not, you can do it in various ways. One simple was is to create a HTML page where it shows a net is UP from some external website, if the link is down, it will show you NET is DOWN status from your local web server. You can then link this page to your local web server, via hotspot advertisement, or you can also use it at main hotspot login page.

When link is UP, user will see the following status.


When link is DOWN , user will see the following status.


In your local web server (If using IIS its C:\inetpub\wwwroot\) Create a new html file and name it netstatus.html,
Now paste the following code it in.

<head>
 <meta name="description" content="NAE INTERNET STATUS INFO PAGE by SYED JAHANZAIB">
 <title>GLASSLINE (Pvt) Ltd. INTERNET SERVICE STATUS INFO PAGE by SYED JAHANZAIB</title>
 </head>

<center><img src='http://i53.tinypic.com/2wrozd2.gif'
 onerror="this.src='gl-netdown.gif'" / align="middle"><p>&nbsp;</p>
 </center>
 <p align="center">&nbsp;</p>
 <p align="center"><span style="text-decoration: overline">
 <strong>
 <font color="#008080" size="4"><br>
 ~!~ Press F5 to Refresh the Current
 Status ~!~<br>
 <br>
 </font>
 <font color="#FF0000" size="4">(You must be connected via dialer in
 order to view the Live internet status)</font></strong></span><p>&nbsp;</p>

For Net up stats, I uploaded the gl-netup.gif to external tinypic server. and for Net Down status, I copied the gl-netdown.gif file to local web server. You can modify this data according to your local scenario. I used this scenario in pppoe environment, you can modify it according to your need, for example, if you don’t have local web server, you can place the image in Mikrotik Hotspot Directory.

To implement this idea in a HOTSPOT environment, Please view the following link.

 http://wiki.mikrotik.com/wiki/Notify_your_customers_internet_is_down,_monitor_connectivity

September 10, 2011

Windows 2003 could not start because the following file is missing or corrupt: \WINNT\SYSTEM32\CONFIG\SYSTEM [SOLVED]


Today morning I received the following error while starting my windows 2003 R2 base file server in my office.

Windows 2003 could not start because the following file is missing or corrupt:
 \WINNT\SYSTEM32\CONFIG\SYSTEM

I was able to solve it using following method. (I thought it might be useful to share this knowledge for others)

  1. Start the computer by using the Windows 2003 CD. At the “Welcome to Setup” screen, press R to repair, and then press C to start the Recovery Console.
  2. Type the number for the appropriate Windows installation, and then type the Administrator account password.
  3. To copy the SYSTEM file from the WINDOWS\Repair folder to the WINDOWS\System32\Config folder, type the following command, and then press ENTER:
    copy c:\winnt\repair\system c:\winnt\system32\config\SYSTEM

    If you receive a prompt to overwrite the file, press Y, and then press ENTER. (You can also copy all the files one by one, as console doesn’t allow you to use * wild card )

  4. Restart the computer.

And you will see your windows booting normally.

September 9, 2011

Load Balancing Users Among Multiple PPPoE Servers on Same LAN !

Filed under: Mikrotik Related — Tags: , , — Syed Jahanzaib / Pinochio~:) @ 1:57 PM


Following are few simple tips N tricks on howto load balance users among multiple PPPoE Servers working on same LAN.

This is some times required if you have thousands of users and you want to avoid overload single server. Following the tips, you will be able to do load balance as well as fail over configuration , if one server dies, other will automatically take the load 🙂

The PPPoE Client sends out a service inquiry and whichever mac address responds first is the one it tries to connect with. This is the easiest way to load balance PPPoE.

# Configure two [or more as per required] PPPoE servers with the same or likewise hardware and same service name to the same switch where clients are connected. Just make sure that on each mikrotik, ip pool for pppoe users should not overlap with each other, working example is as follows …

Mikrotik -1  >  Ip pool for pppoe users = 172.16.0.1-172.16.10.255
Mikrotik -2  >  Ip pool for pppoe users = 172.16.11.1-172.16.20.255
Mikrotik -3  >  Ip pool for pppoe users = 172.16.21.1-172.16.30.255

adn the public ip pool should be different as well.

# From Each client, the two pppoe servers must be reachable at L2.

# Each client can connect randomly to one pppoe server or the other. there will no FIXED percentage, but in practical it maybe around 60-40% or 45-55% sort of. The PPPoE Client sends out a service inquiry and whichever mac address responds first is the one it tries to connect with.

# If one server is Down, All users can Connect the second one or Only available Server.

Howto scan pppoe servers running on your Network.

# By using pppoe scanner, you can search how many pppoe servers are running in your network. Open Terminal and use

/interface pppoe-client scan ether1 [LAN]

OR Likewise
it will show you all the servers running on this interface connected network.

.

Regard’s
Syed Jahanzaib

Older Posts »